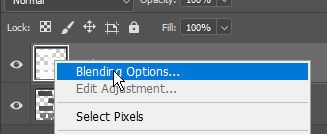
Parallax Interior Mapping - Map creation
Table of contents
About Unreal Engine Cube map

Cubemap provide a simple method of environment mapping, in which distant scenery - such as skies and surrounding environments - is mapped to a panoramic texture. Under the hood, these textures are stored as a series of six images mapped to the inside faces of a cube. - Epic Games
About Parallax Interior Mapping
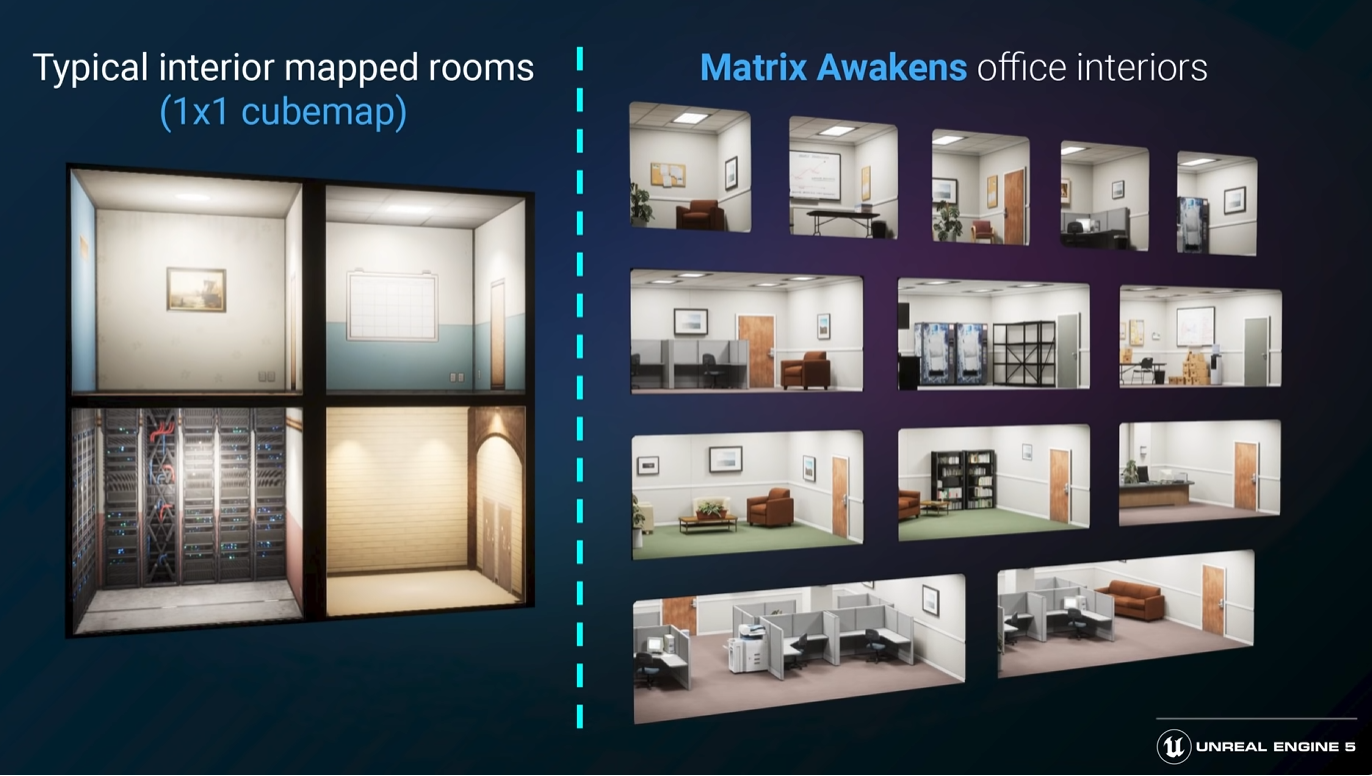
The CitySample Tech Demo showed a way to work with Parallax Interior Mapping, but the map-creation workflow has not been released by Epic Games, as they only shared the key concepts of the technology.
About Dual Depth Relief
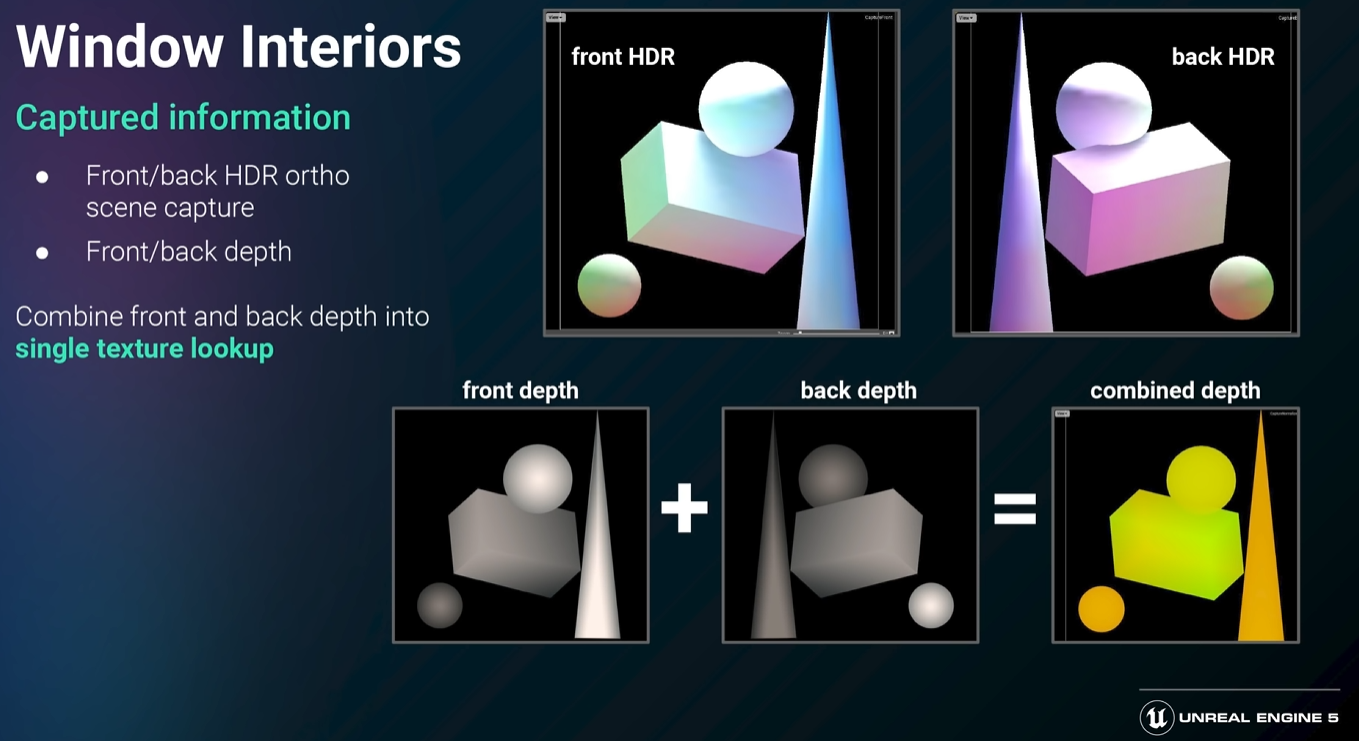
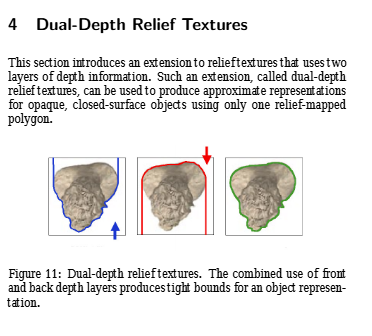
EpicGames mentioned applying a depth map to the interior. In fact, this approach is similar to an older technique called dual-depth relief mapping, which uses a ray-tracing HLSL shader along with a specialized texture known as a Dual-Depth Relief Texture.
From concept to production (maybe?)
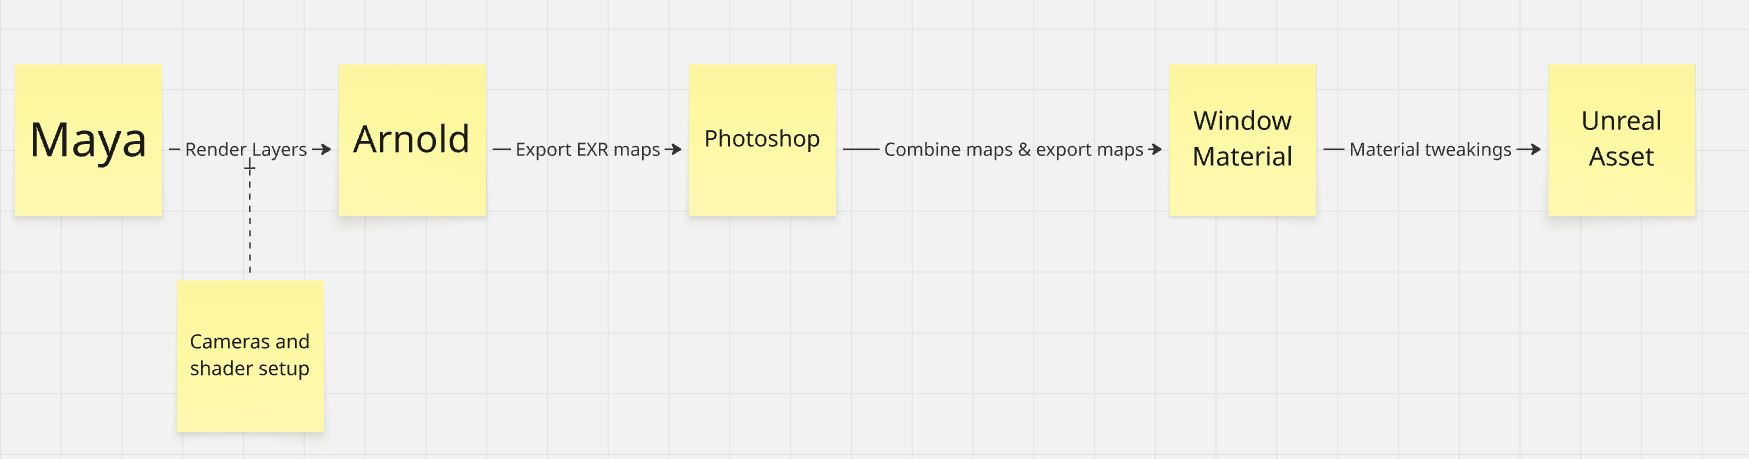
This walkthrough showcases the steps required to create the maps used for Parallax Interior Mapping. This guide focuses on map creation and some basic material setup.
It consists of three maps, which will be created within Maya:
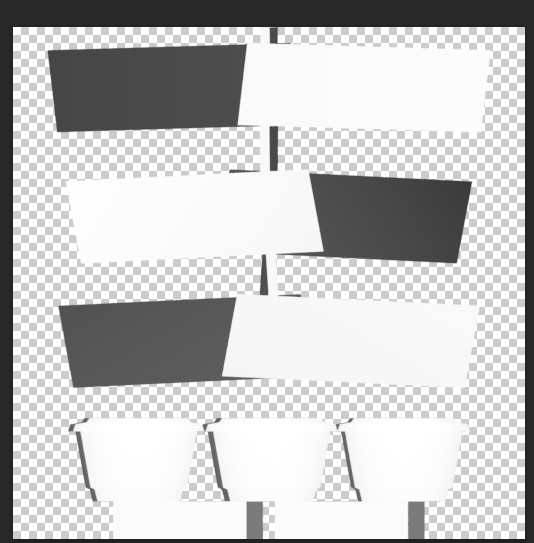
- Dual Depth Map – represents the depth of the room.
- Front Color Map – the color map of the room’s front side.
- UE Cube map – the cube map used in Unreal Engine for the interior environment.
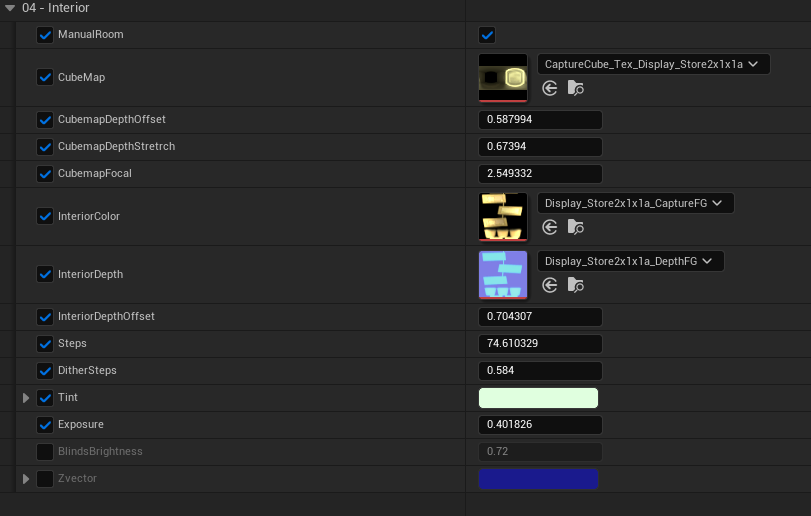
Material Tweaks
I've made some adjustments to the existing Window material to gain more control, as this will benefit us in implementing a wider variety of assets that we want to apply.
Some features that included to be able:
- Offset Cubemap depth position to make an illusion of shallow room depth.
- Stretch and set focal point of the cubemap for minor adjustments.
- Tiling UV of the window dirt.
- Tint color to the window dirt.
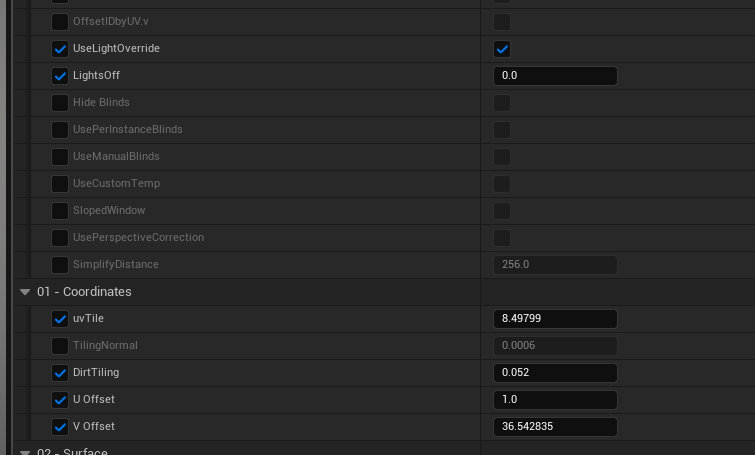
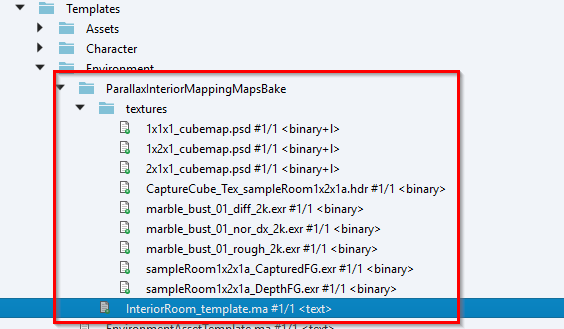
Prerequisite
To start baking maps, first sync the template Maya scene on the Tadpole project:
//tadpole/dev-main/Team/Art/Templates/Environment/ParallaxInteriorMappingMapsBake
Scene Walkthrough
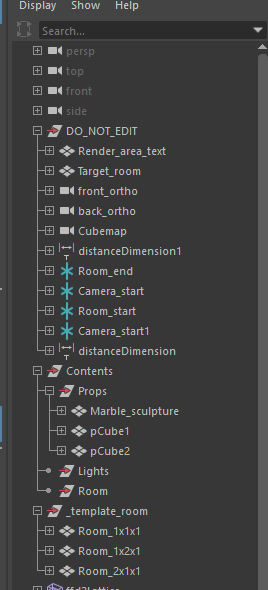
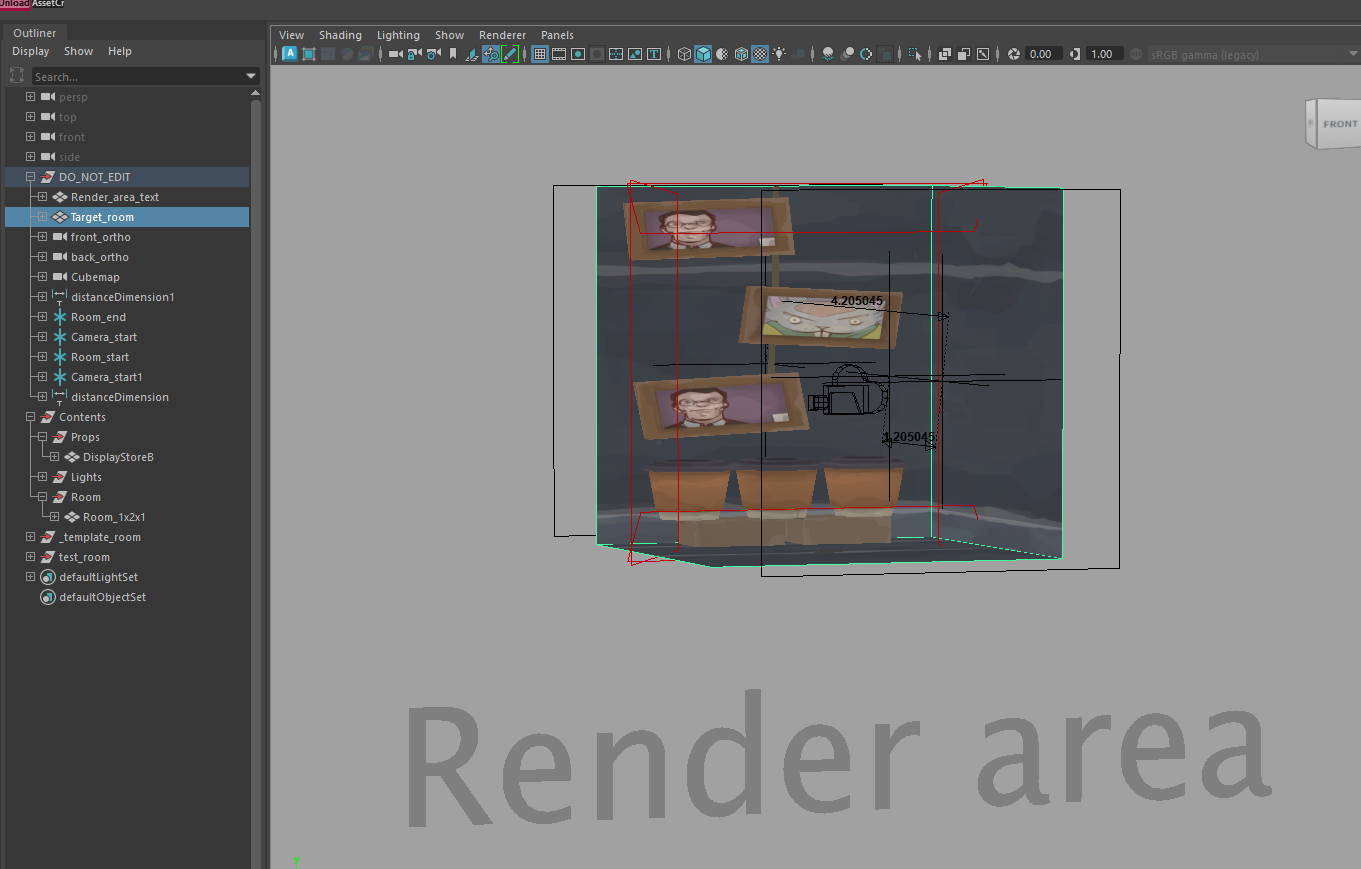
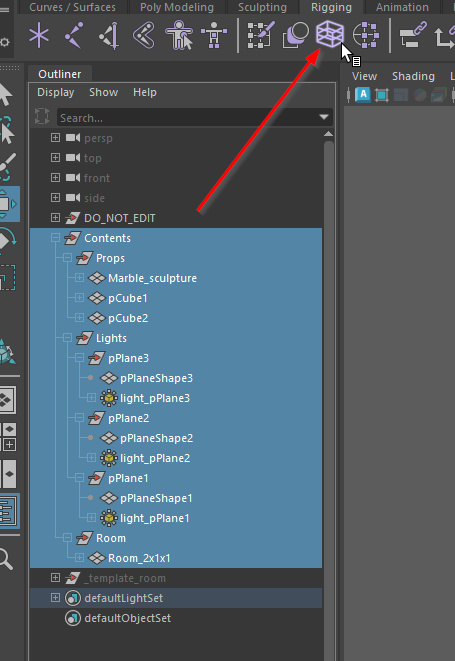
DO_NOT_EDIT
This group contains important scene components. We should not be bothered by touching this group.
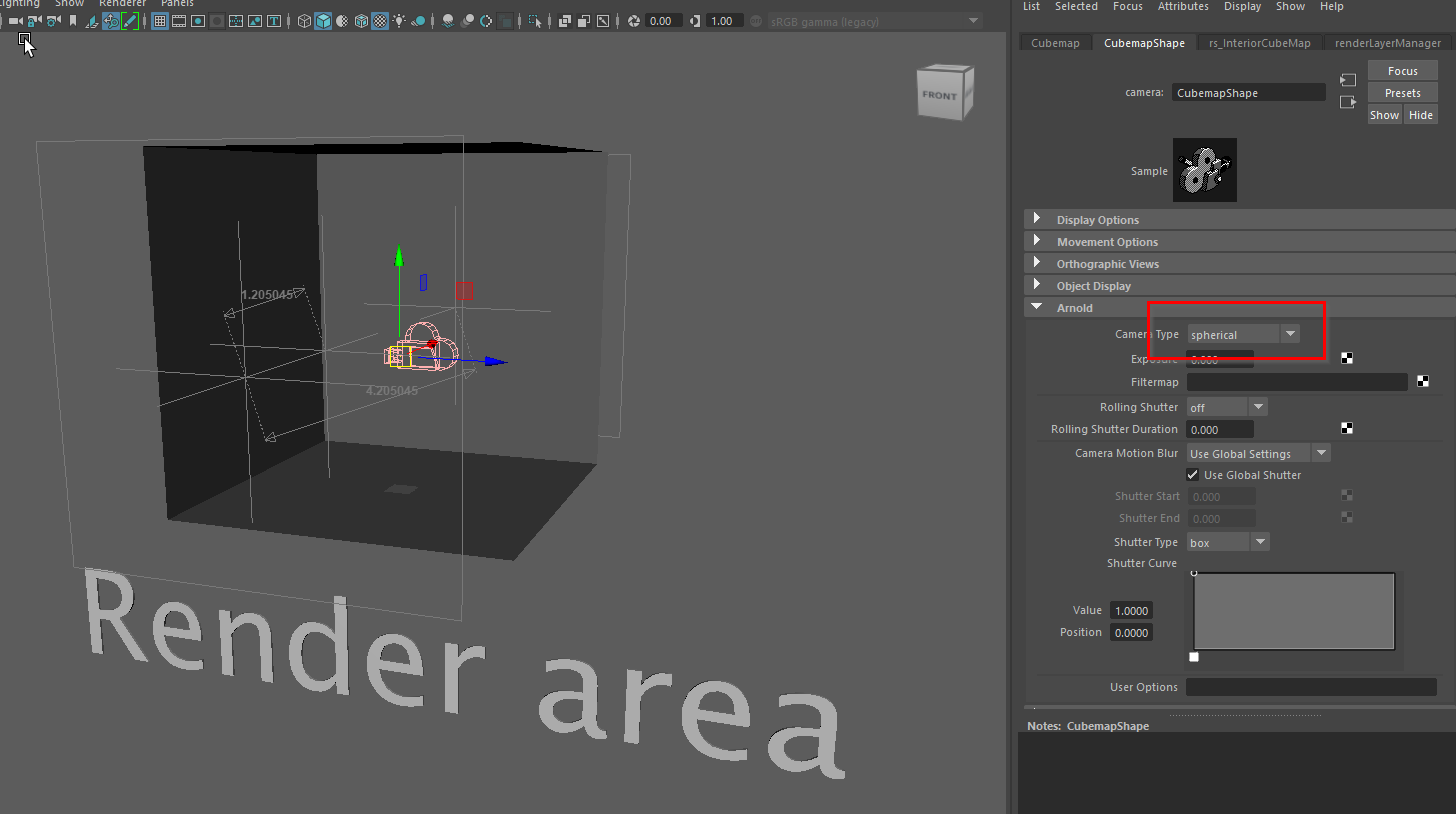
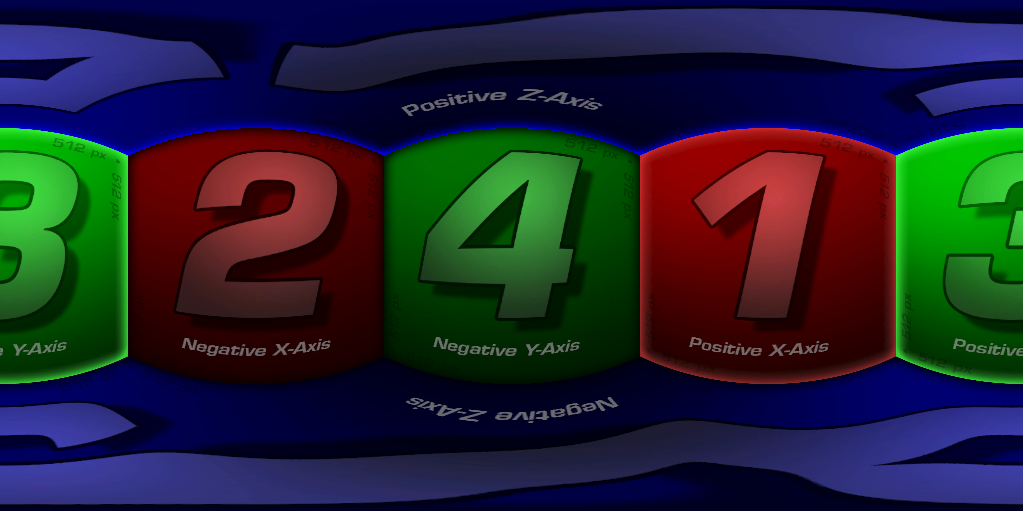
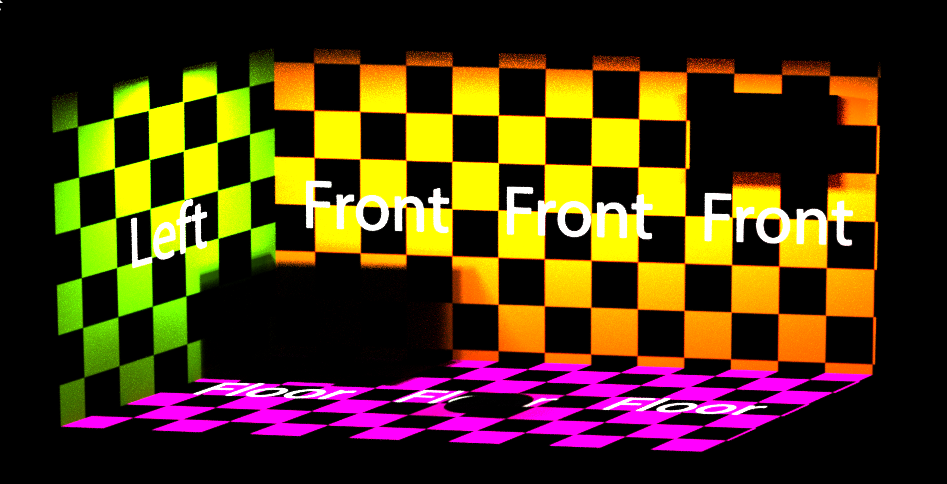
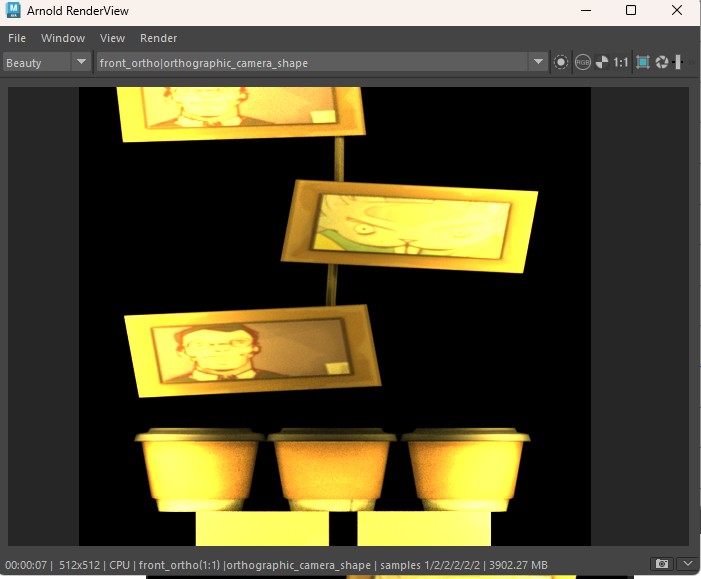
Maya Arnold camera “spherical” type, with rotation offset placed in the center of the Cube room helps capture the Cubemap efficiently, enabling us to render the Cubemap directly in Maya.
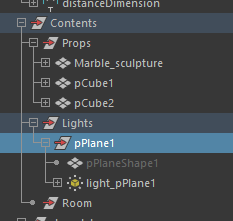
Contents
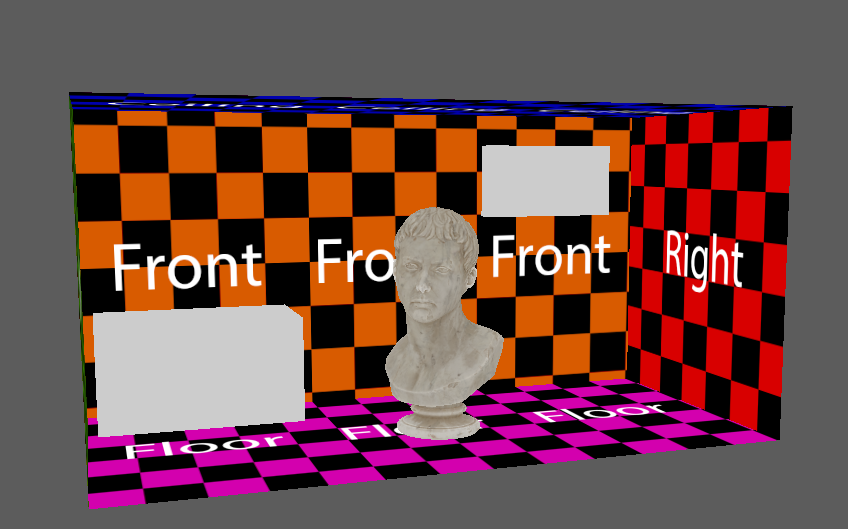
Props
All props within the room should be placed here.
Besides geometry, additional material setup for geometry is required.
Material setup can be found at guide
Lights
Room
This group contains the room mesh. It should be the only room that represents the interior.
_template_room
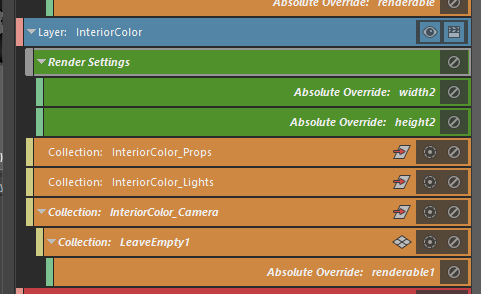
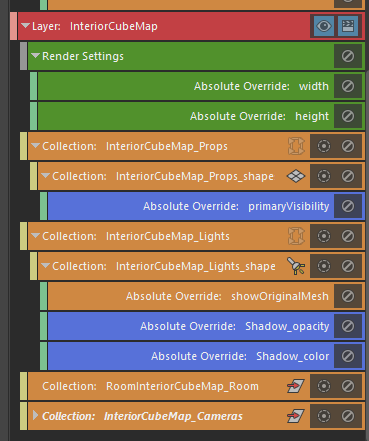
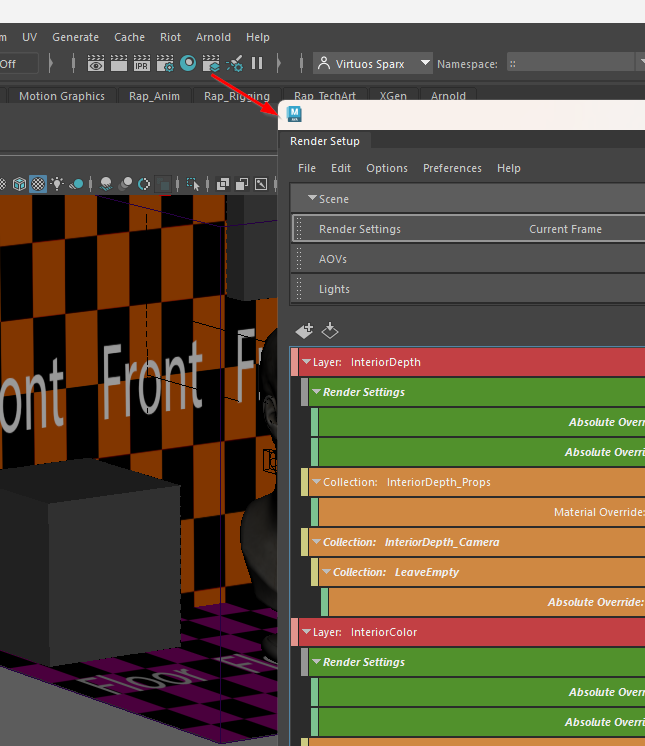
Arnold Render Layers
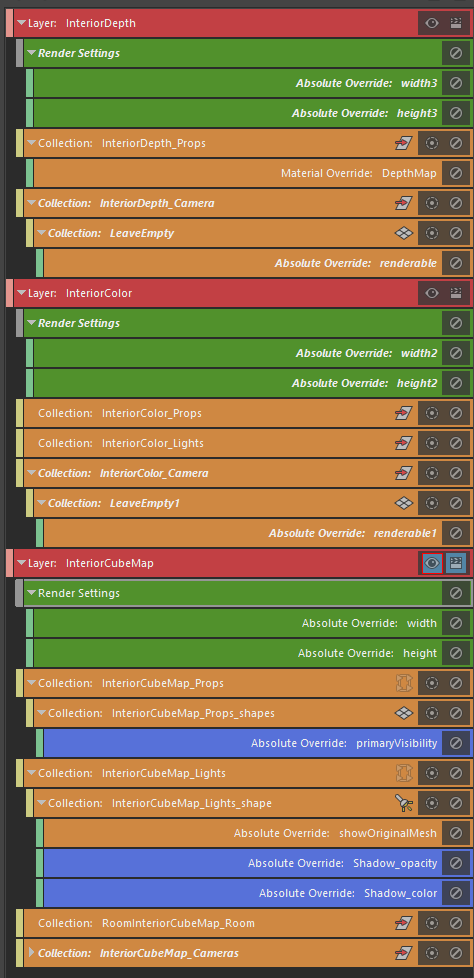
Our bake set, each bake set contains layers that alter the scene render setting.
Activating one at a time allows us to switch the bake set fast.
- InteriorDepth → Dual depth map
- InteriorColor → Color map
- InteriorCubemap → Cube map
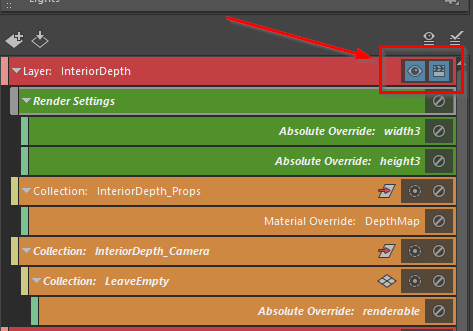
Orange-colored layers are associated with scene components, which help us set up the bake set.
It’s not recommended to adjust these layers.
Green-colored layers are layers that are safe to edit.
We can adjust the map width and height resolution manually.
By default, it follows City Sample Tech Demo maps resolution, maps are set with:
- Dual Depth map - 512x512
- Color map - 512x512
- Cube map - 512x256
Blue-colored layer is exclusively for the Cube map interior setting.
e.g: “primaryVisibility” disable visibility of props within the room, leaving only its shadow.
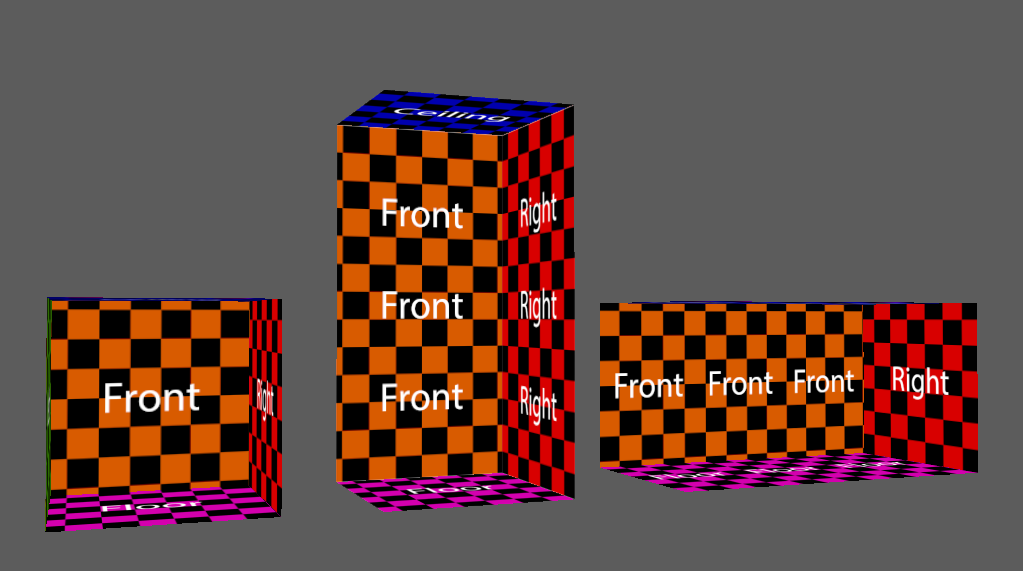
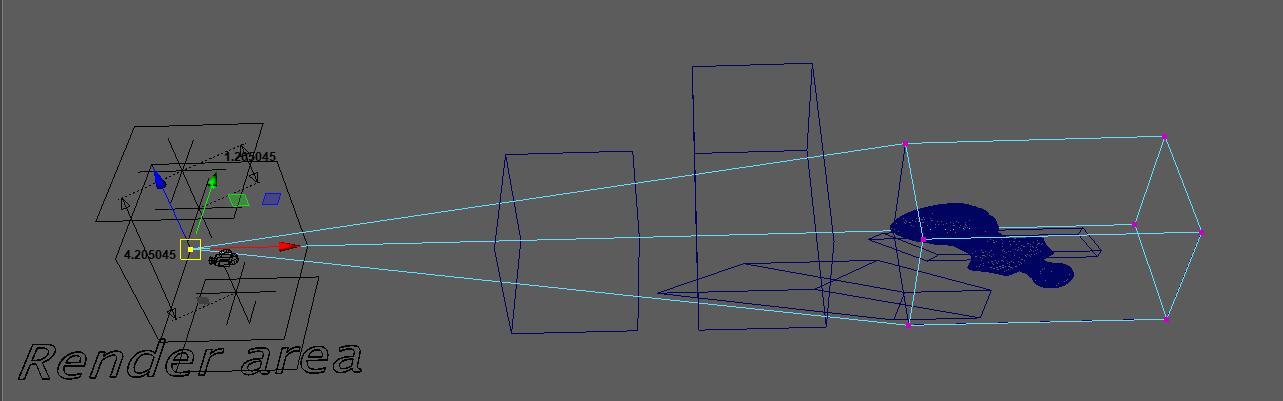
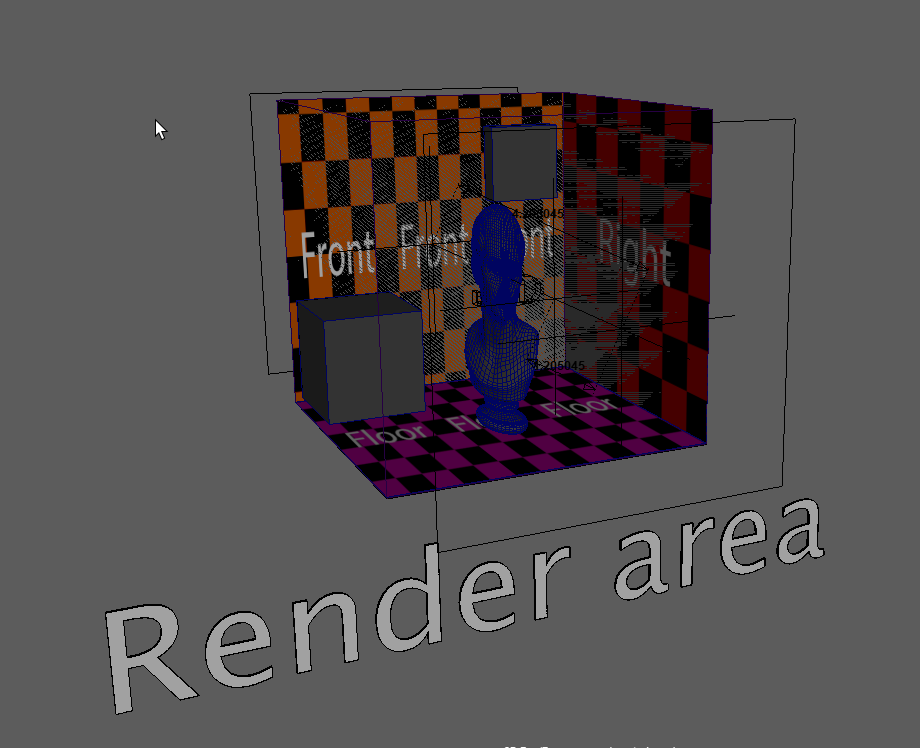
What type of room do you need?
How is the room overall silhouette ratio? How wide or how tall should a 3D Plane represent a room?
Based on the room ratio and naming conventions of City Sample Tech Demo, a default square room type is identified as 1x1x1.
IMO it means 1 meter on the X-axis, 1 meter on the Y-axis, and 1 meter on the Z-axis. Non-square room ratios are also identified by additive integers and named according to their aspect ratio.
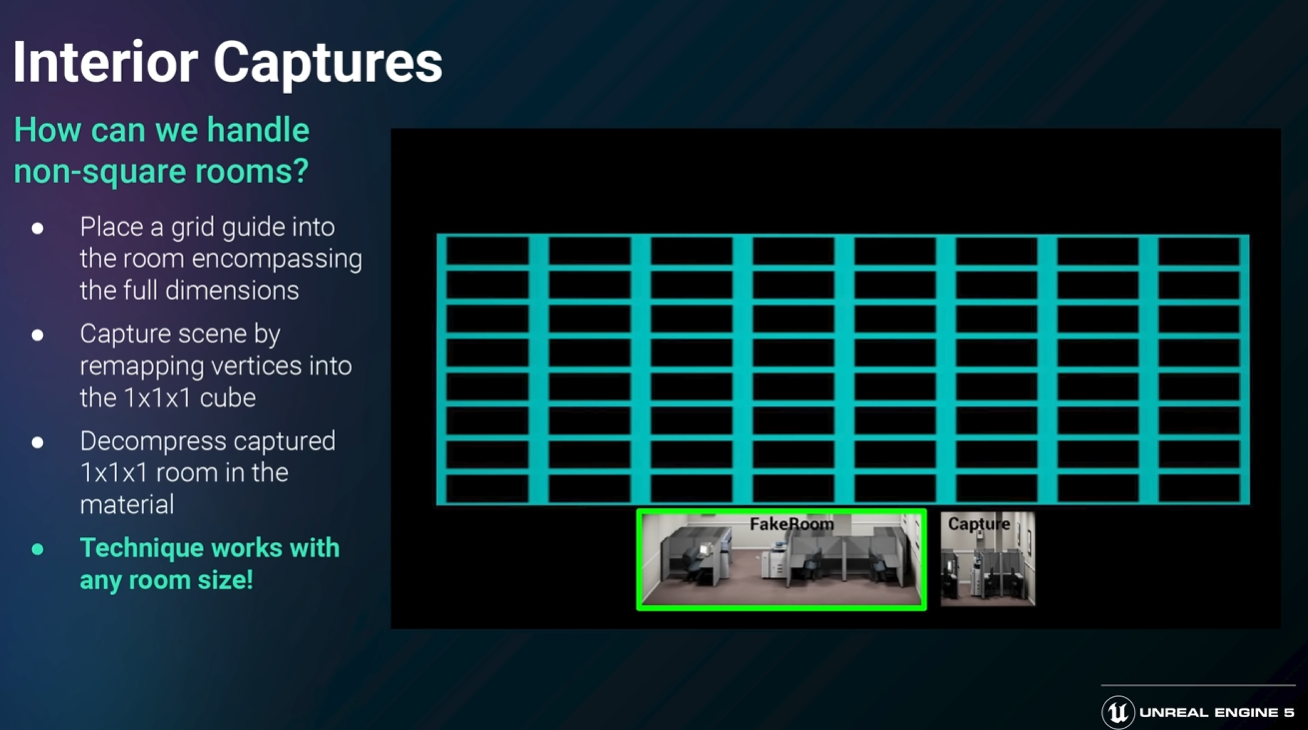
Our “Target_room” mesh is set up as a 1:1:1 ratio, similar to the traditional 1x1x1 cube map format.
Any room type must be squeezed into the “Target_room” regardless of its ratio. This ensures our bake scene setup is correct.
Checkout this guide
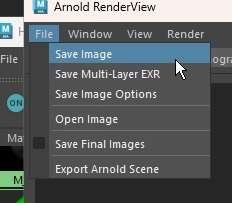
How to Render Map
See
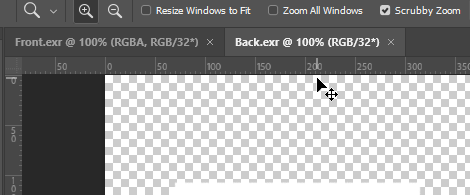
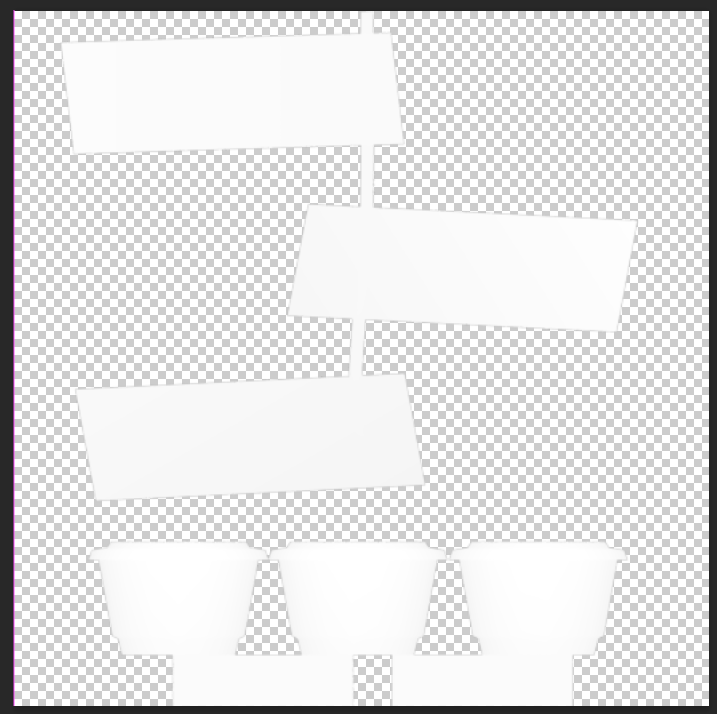
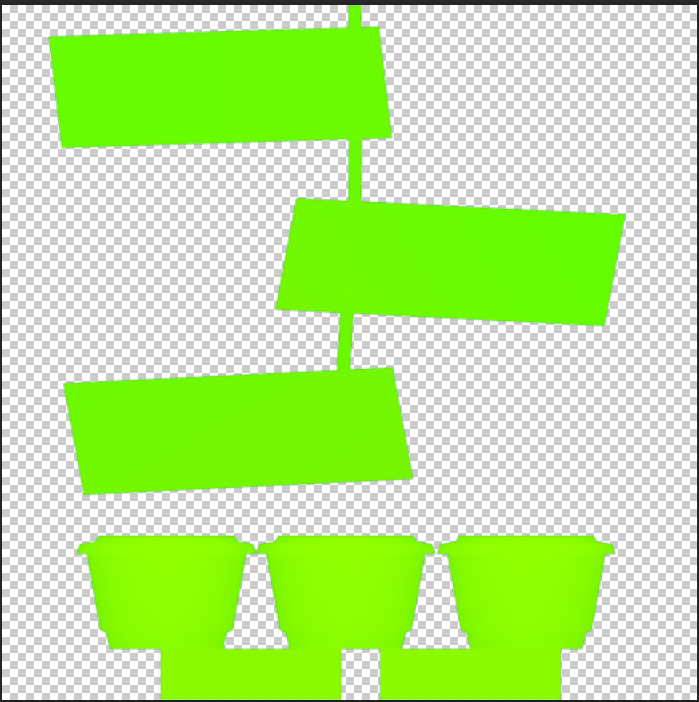
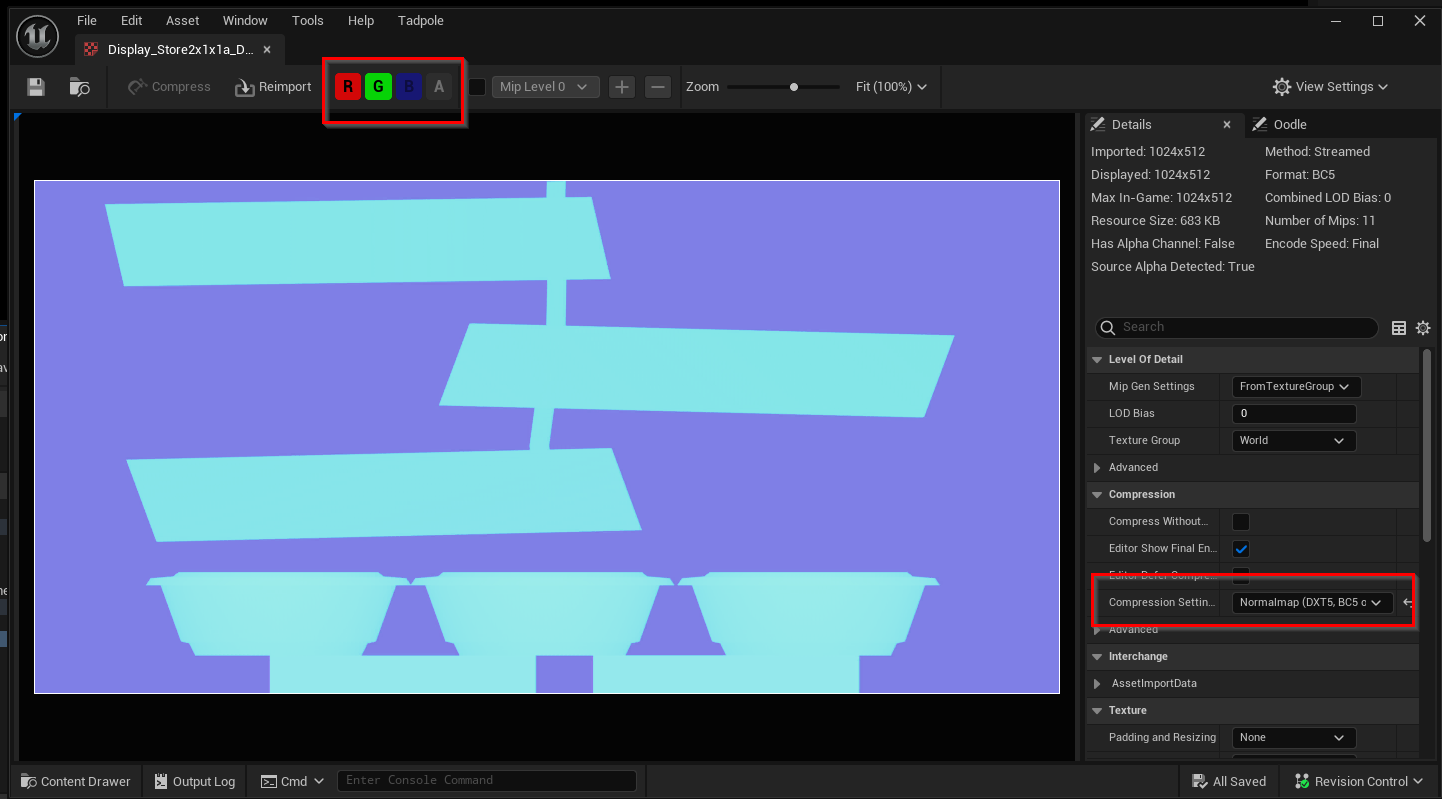
Dual depth map


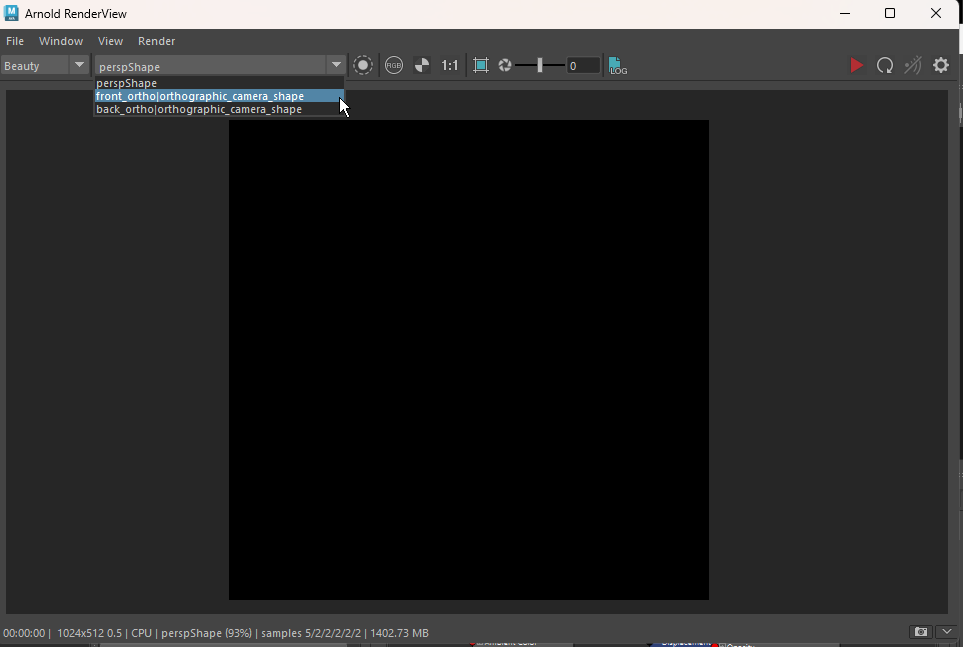

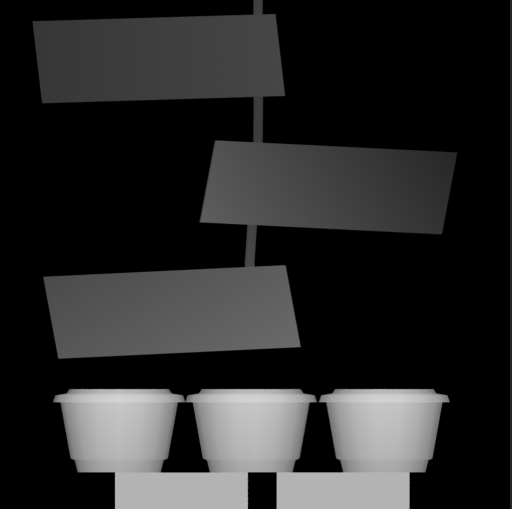


These two depth maps are used for the next steps, so their names are purely for identification.
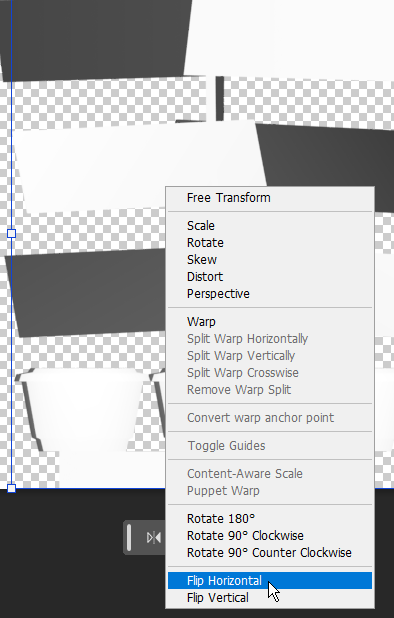
Combine Front and Back depth map into a dual depth map

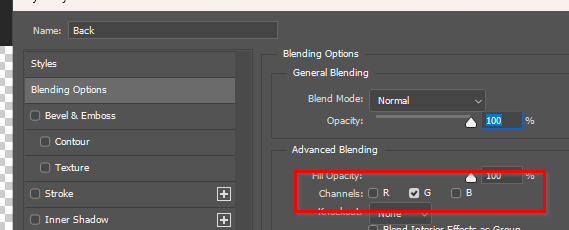
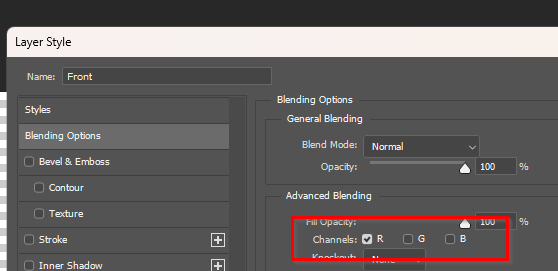

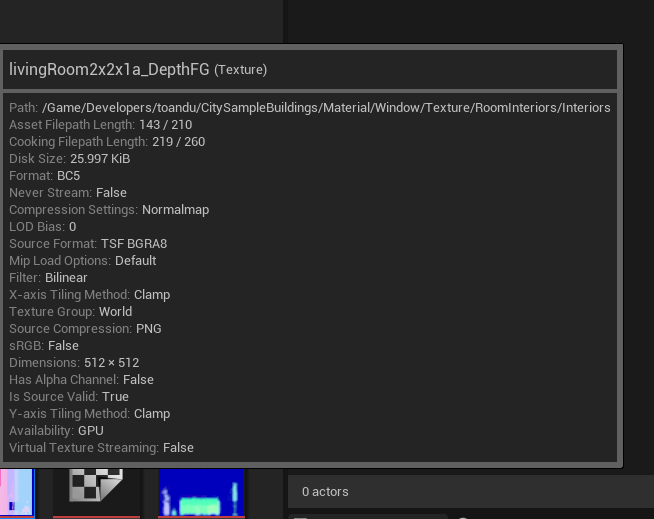
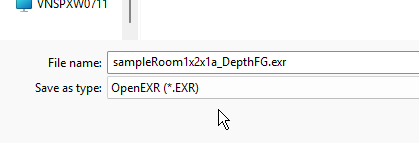
Following Tech Demo name convention, we can have a depth map named such as:
<room_type><room_ratio><variant>_DepthFG.exr
Color map

Following Tech Demo name convention, we can have a color map named such as:
<room_type><room_ratio><variant>_CapturedFG.exr

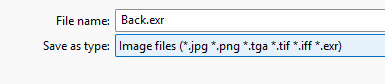
Cube map

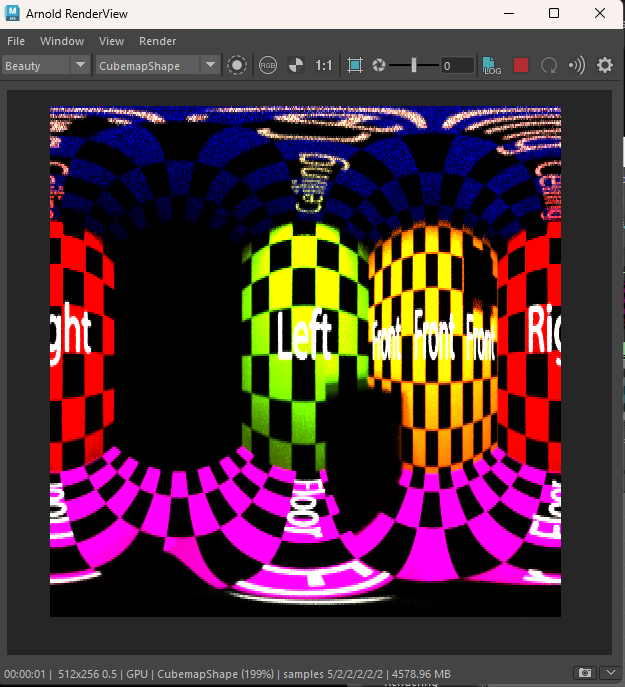
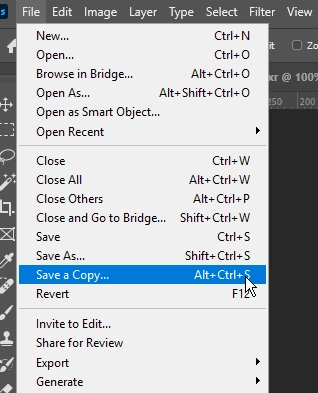
Unreal Engine recognizes Cubemap file type as hdr, not exr!
Since Arnold allows us to export as exr, we can re-export it as hdr in Photoshop.
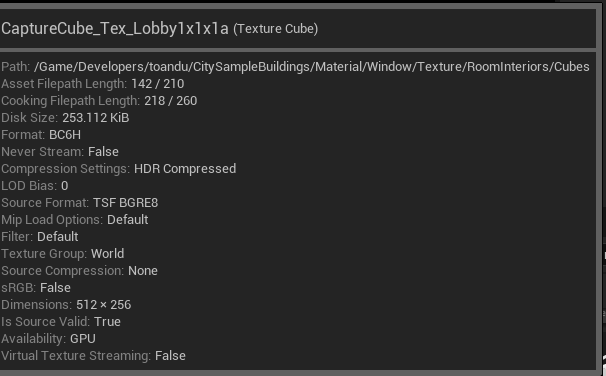
Following Tech Demo name convention, we can have a Cubemap named such as:
CaptureCube_Tex_<room_type><room_ratio><variation>.hdr

Extras
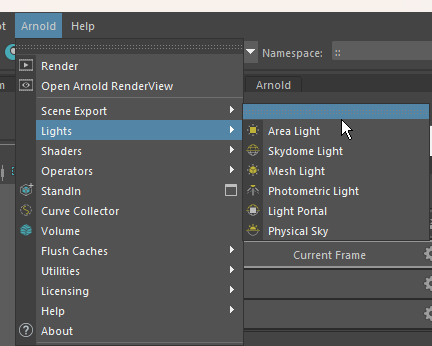
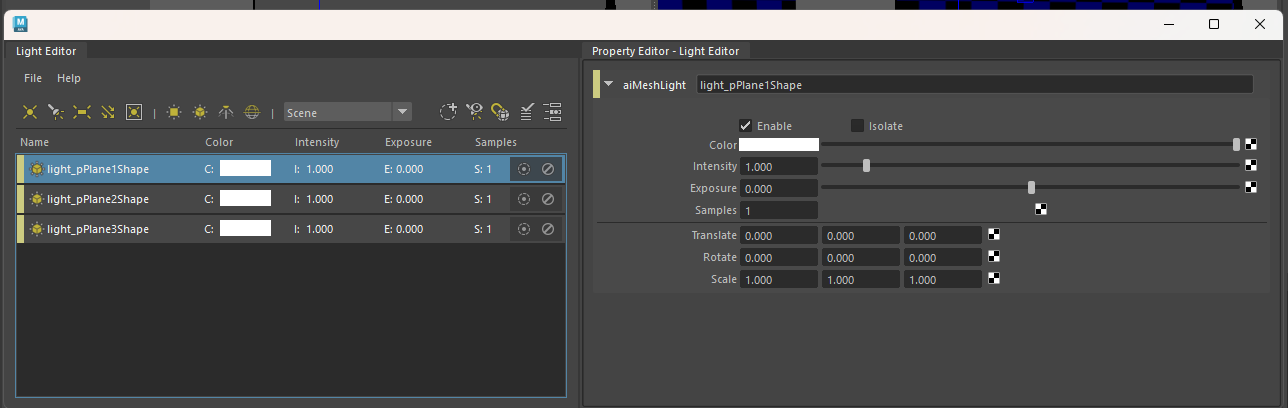
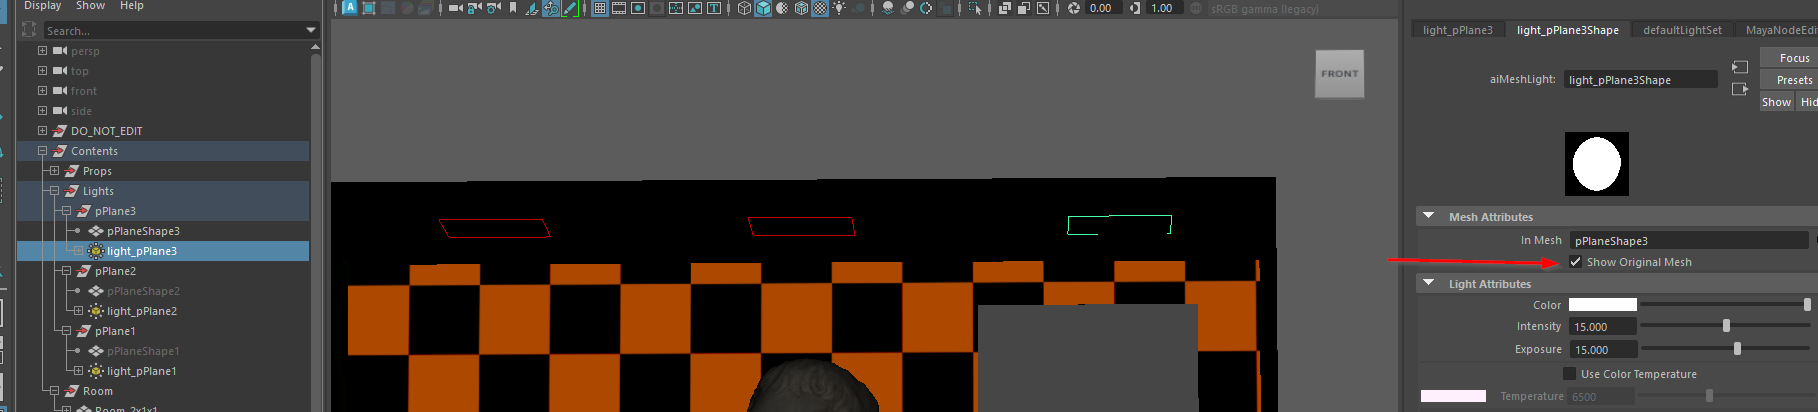
How to create light in Maya
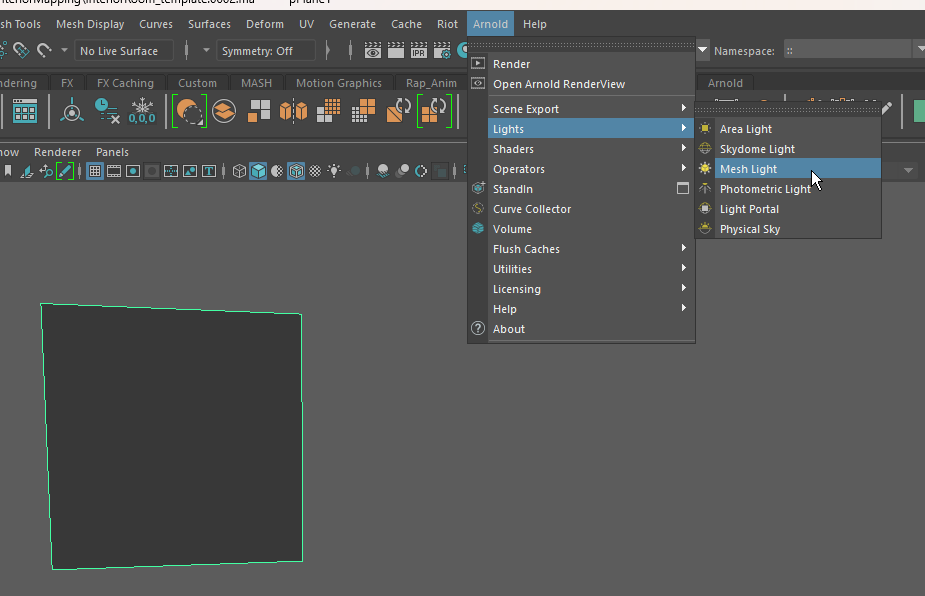
Create a geometry and convert it to Arnold Mesh Light
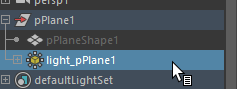
Place it under “Contents/Lights” group to render lights with bake set.
Other Light type is usable too! The reason I recommend using mesh light is to take advantage of the ability of the FFD lattice deformation on our light mesh.
If you wanted to place lights in the Render area, it’s totally okay!
How to duplicate Arnold mesh light
How to switch Arnold bake set
Configure Arnold and Viewport for better productivity
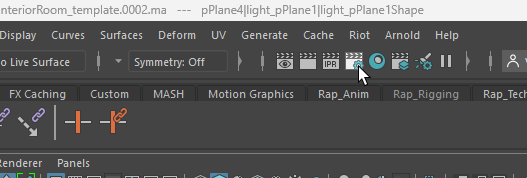
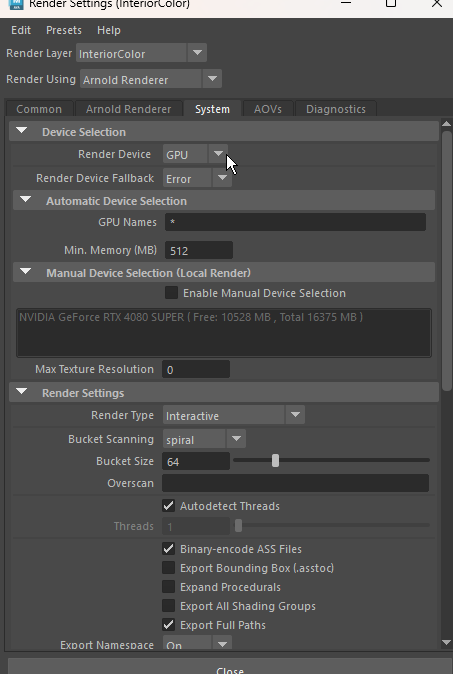
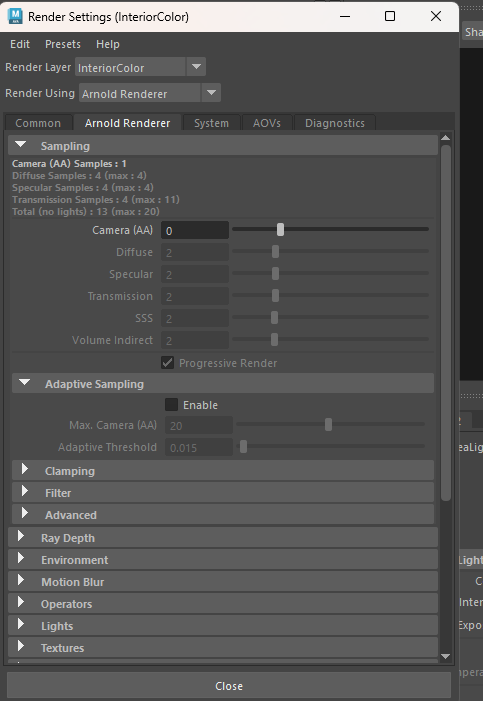
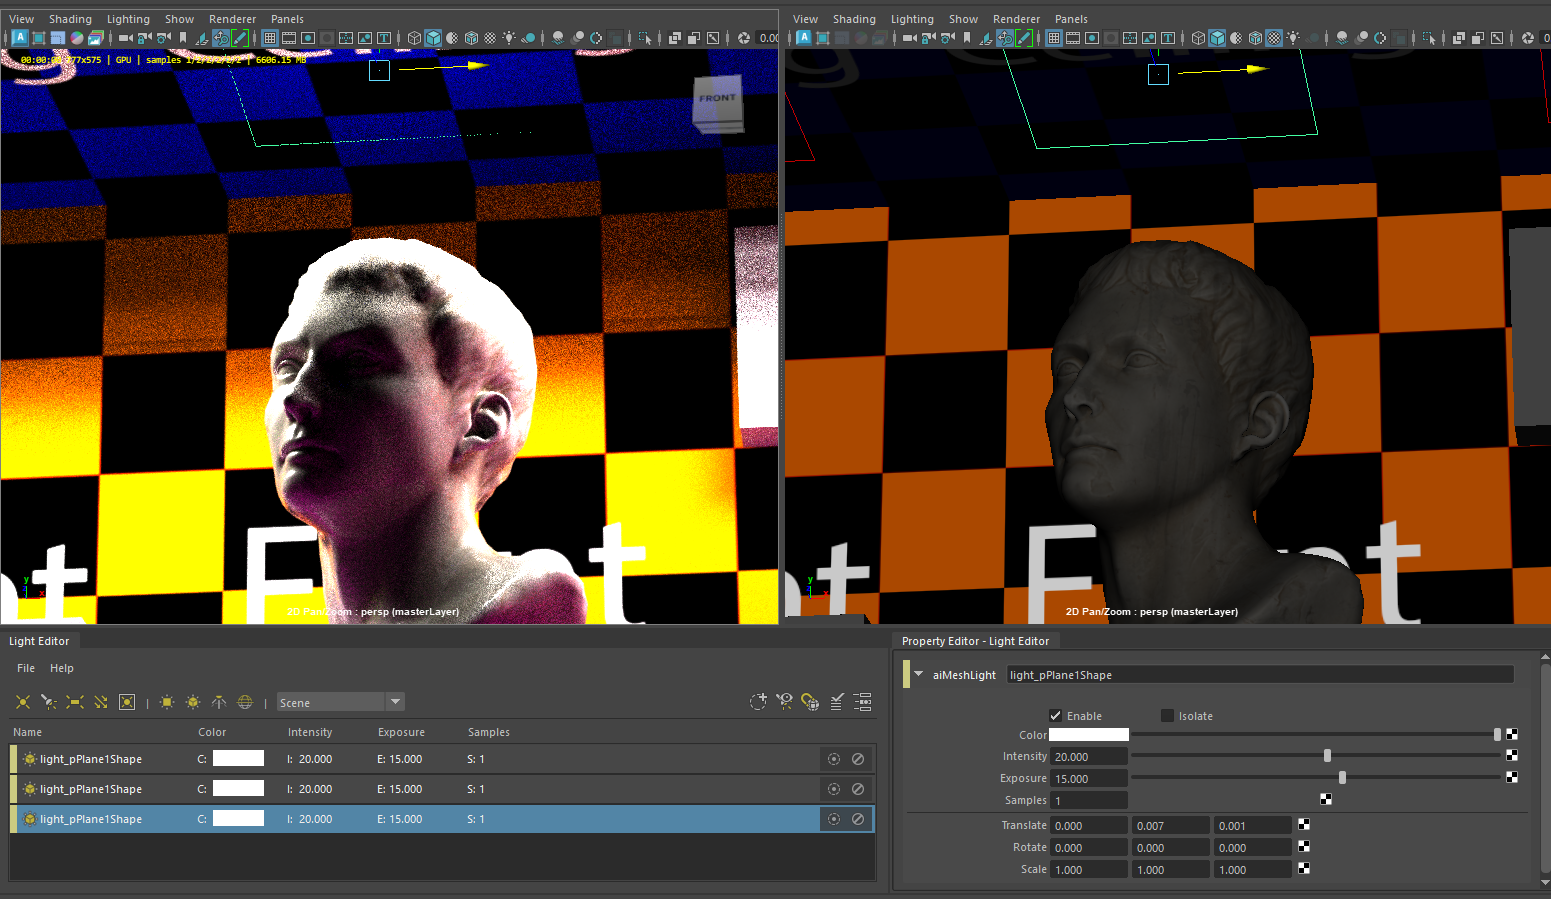
Tweaking Arnold Renderer Camera samples counts, and setting Render device to GPU helps us preview light in real-time without taxing hardware performance.
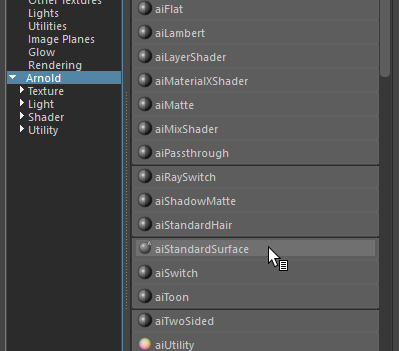
Set up Arnold material for room contents
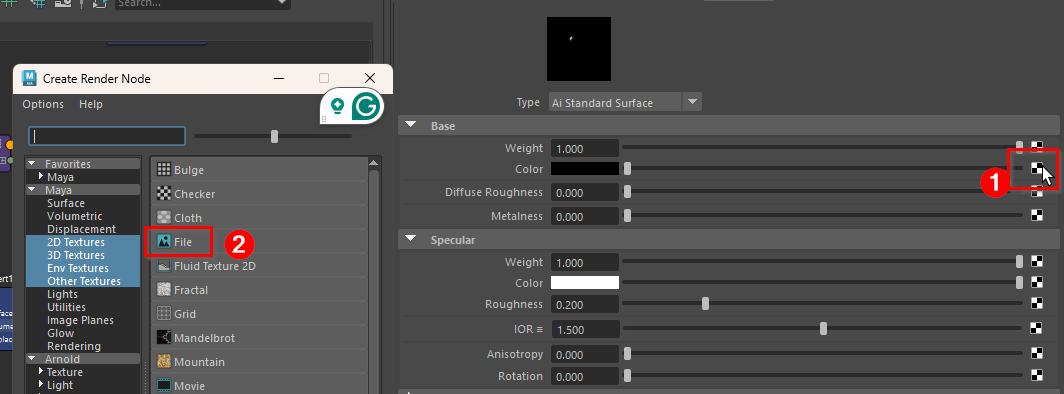
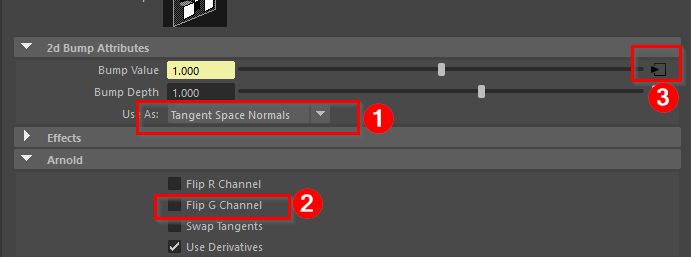
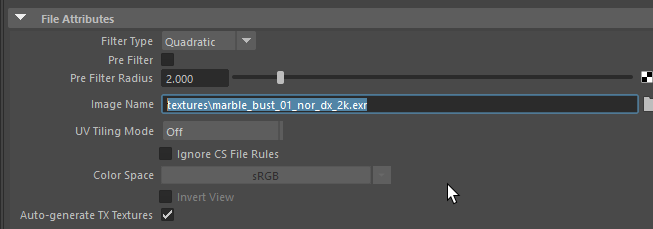
Assign Diffuse map
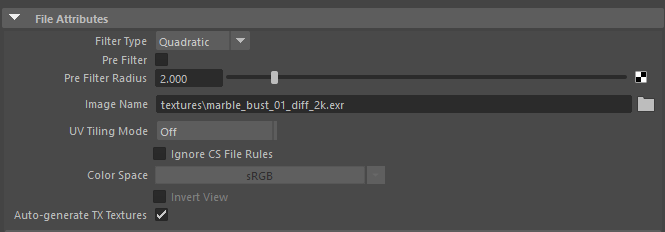
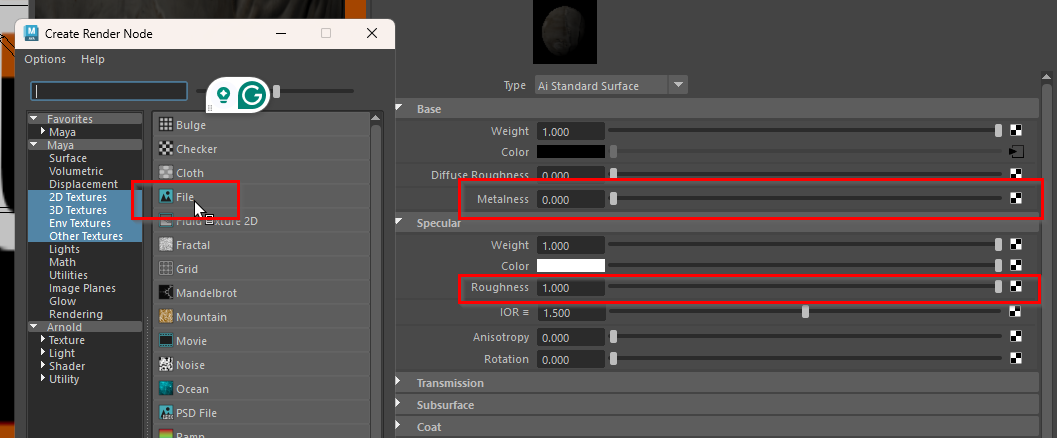
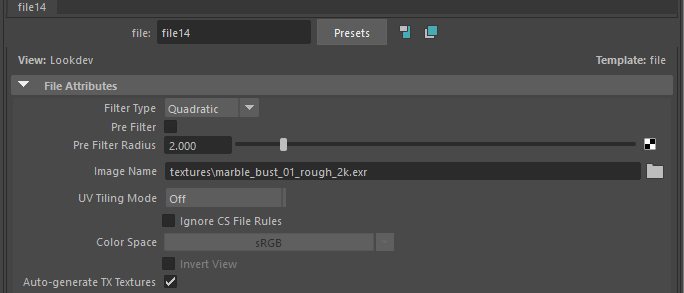
Assign Roughness & Metallic map
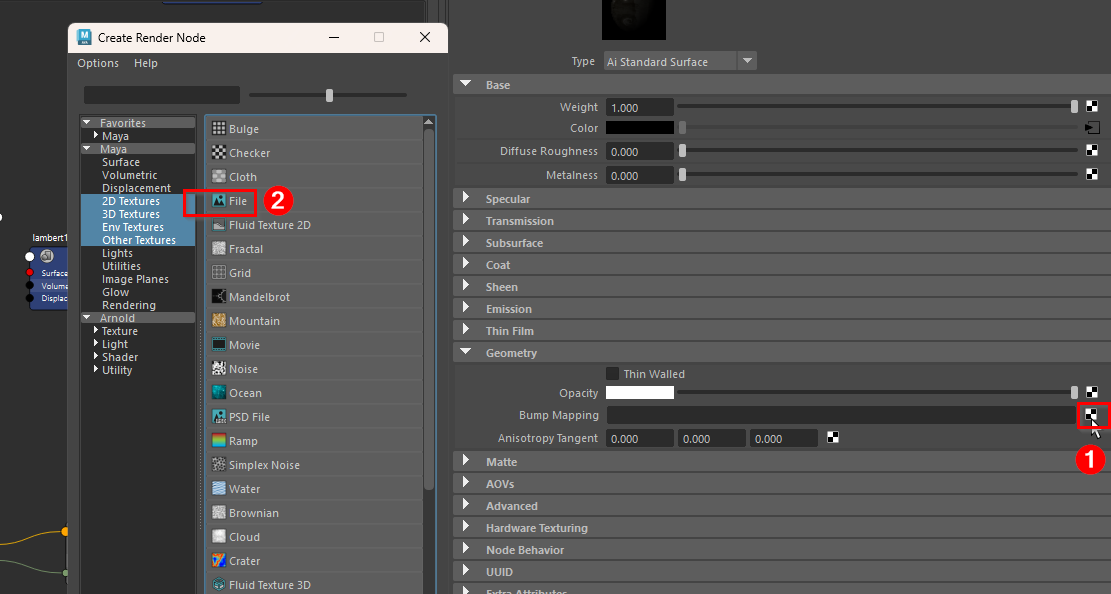
Assign Normal map
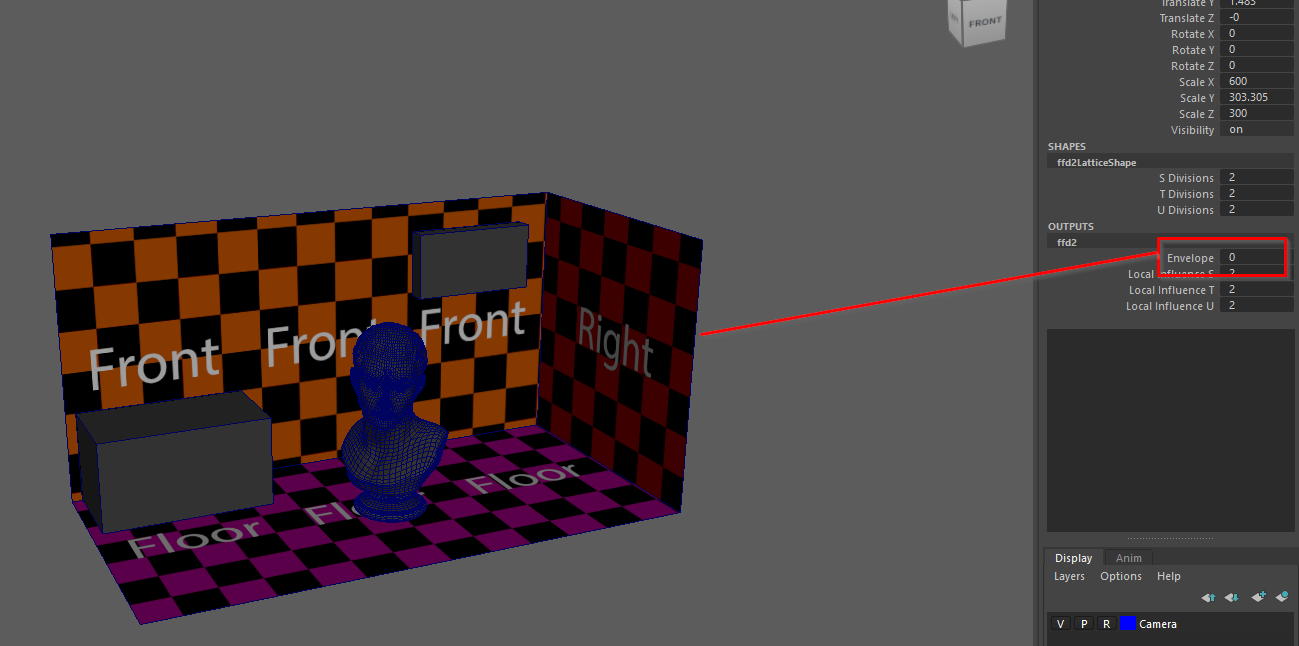
Compress room contents into “Target_room”
This approach helps bind our working bake set contents to an FFD lattice deformer, then compresses it into the Render area for maps bake.
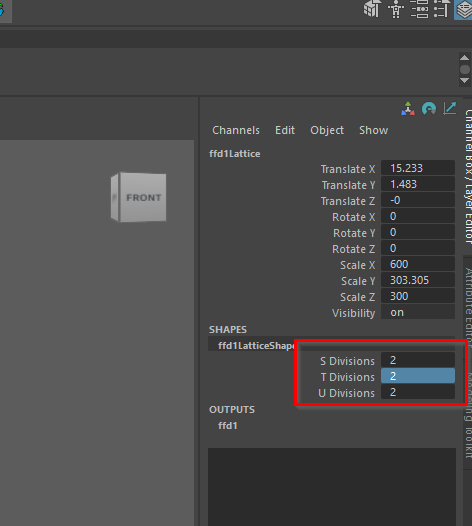
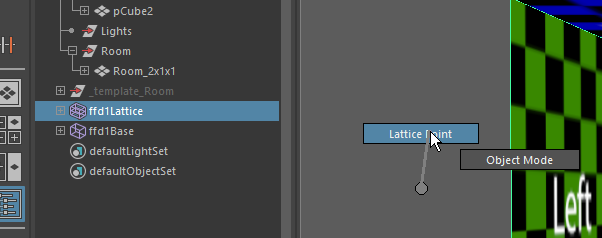
Disable Latice “Envelope” attribute to revert the Contents to the original transform